
Cork Wall Tutorial
- Feb 18, 2020
- 4 min read
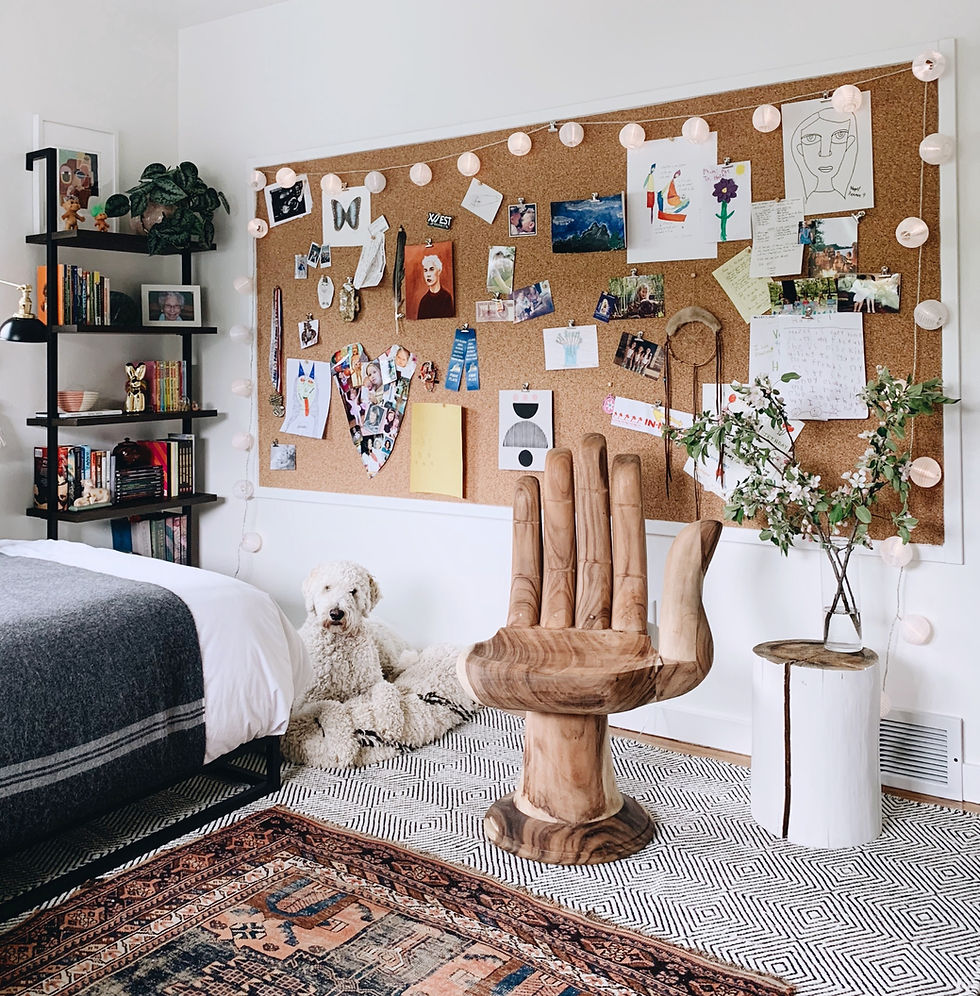
I promised you some info on this cork wall after Hazel's room reveal. Let me start with an apology for the lack of photos. We had a few other projects going on the same day and I had no idea you would all be so interested in this one! I'm going to do my best to explain how we put this cork board together. It was an easy project, that only took an hour or so and came in around $85.
PROJECT LIST
Cork Sheet 4' x 8' 6mm thick - $53
Rubber Cement - gallon - $8
Thin plywood or paneling 4' x 8' - $10
Paint Roller - $3
Plastic Paint Tray - .50¢
Razor Knife
Tarp
Rolling Pin
Trim - $10
The first thing we did was determine the size of the cork board that would work best for this wall. Initially I wanted to cover the whole wall but cork is more expensive than I thought. If you want to cover an entire wall you could use this same method and skip the trim.
I found this 4 x 8 roll of cork and the reviews were iffy but the price was right. I took a chance and it worked out great. When it arrived we rolled it out for a few hours and put books on the ends to flatten it out. One end was crumbly as the reviews said it might be but it was also 6" longer than the 8' it was supposed to be so it worked out.

While it was flattening out we measured and marked out the area where we wanted it. I just eyed up a good height and centered it on the wall. Then we marked out all of our studs above and below it's destined place on the wall.
We had previously purchased a 4' x 8' sheet of birch panel which is similar to a thin plywood. (Any thin wood sheeting would work, it's only meant to protect the wall.) Jake held it up and I leveled it and then secured it to the wall with screws along the studs. We probably used 40 screws. We hit every stud on the top and bottom and every other stud on a few rows in between.
The birch panel was a step I almost got lazy on and skipped. It would have been easier to just glue the cork to the wall. I'm glad I didn't though because if we ever want to remove it we can just peel off the cork, remove the panel and fill the screw holes. If I had glued it to the wall it would have ruined the drywall.

For the next step you will definitely need two people. First OPEN ALL THE WINDOWS! The rubber cement smells TERRIBLE so use a mask. Hazel slept in our room the night we did this and I left her windows open and shut her bedroom door for the night and it was cleared out by morning. I ordered two small cans of the rubber cement because of a tutorial I read but I wished I had more because we just barely had enough. If you do this project in this size I would spring for the gallon to make sure you have good contact. It's very sticky so use a tarp to protect your floors!
We trimmed the crumbly bits off of the cork with a razor knife while it was still on the floor. You want to put a layer of rubber cement on the cork and the birch panel. I poured it out in a paint tray and rolled it on the cork and panel with a semi smooth nap roller just like paint. Then Jake and I picked it up together and lined it up at the top and smoothed it down the birch panel. I used a rolling pin to make sure it made good contact everywhere.


Like I mentioned earlier the cork was bigger than the panel. We waited an hour or so and then trimmed off the excess with the razor knife.
Unfortunately I didn't take any photos of us trimming it out. We chose the same trim we used on the baseboards and windows in a 1 1/2" width. We cut the trim to size and used our nail gun to attach it to the wall. You can do this step without fancy tools! If you have a saw and a measuring tape and a hammer, you can do this!!

That's it. So far it's held up great. The only hard part of the project was dealing with the rubber cement smell for a few hours.
I got Hazel a few cute tacks (I'll link you to below) and jammed those right in all over the place to make sure the cork was keeping good contact while it dried.
Here are some easy links to the things I purchased online for this project. The clip push pins are really great because she can hang art and photos without putting holes in them!
Send me photos on Instagram if you make your own cork wall! I would love to see! If you have any source questions about Hazel's room you can probably find them right here.
XO, Meg


Comments